Add a User Journey
To add a new User Journey, you first need an existing website within your account. User Journeys interact with your website through a real browser like an actual user would. This allows you to spot any issues with your site which are hindering your customers.
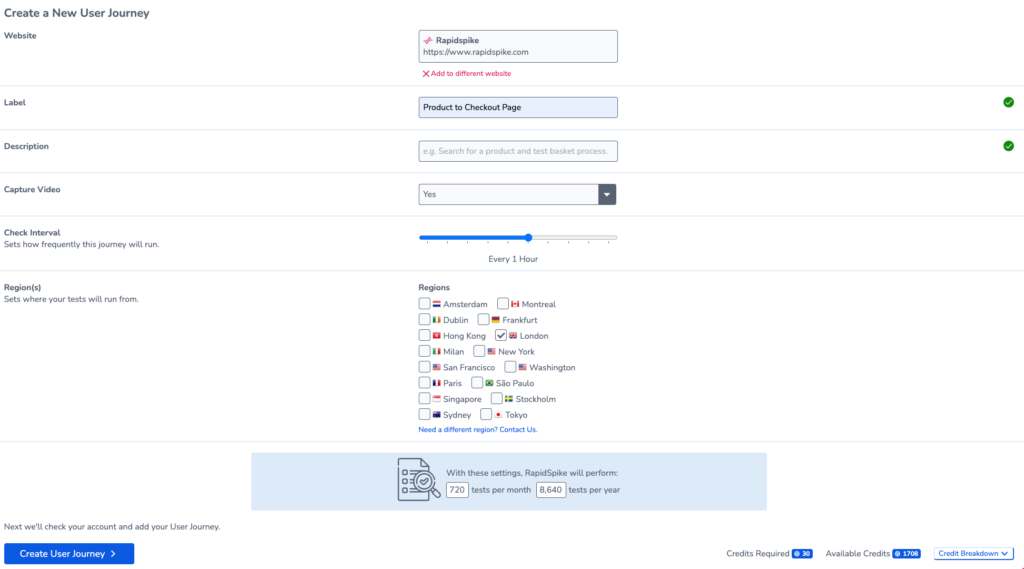
Create a new User Journey
- Click Create and select User Journey
- Give your Journey a label
- Pick if you want to Capture Video recordings.
- Adjust the check interval to set how often the User Journey runs.
- Select the regions you want your user journey to run from.
- Once you are happy with the configuration, click Create Journey to see your new User Journey.
The number of regions you choose to test from, and the frequency of the check interval will affect the number of credits the User Journey costs. You can see this amount at the bottom of the page.