Custom Dashboards
Table of Contents
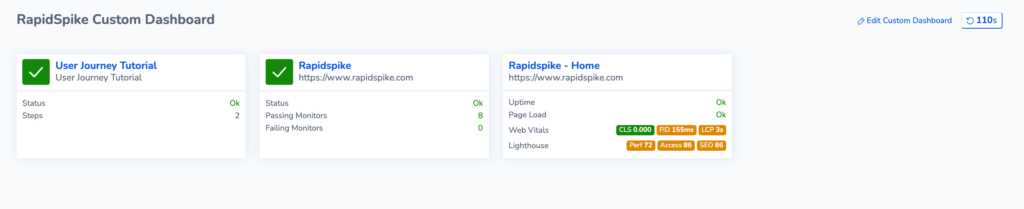
You can create a Custom Dashboard to display items such as User Journeys, Page Load, Websites and Servers on one dashboard.
Create a Custom Dashboard
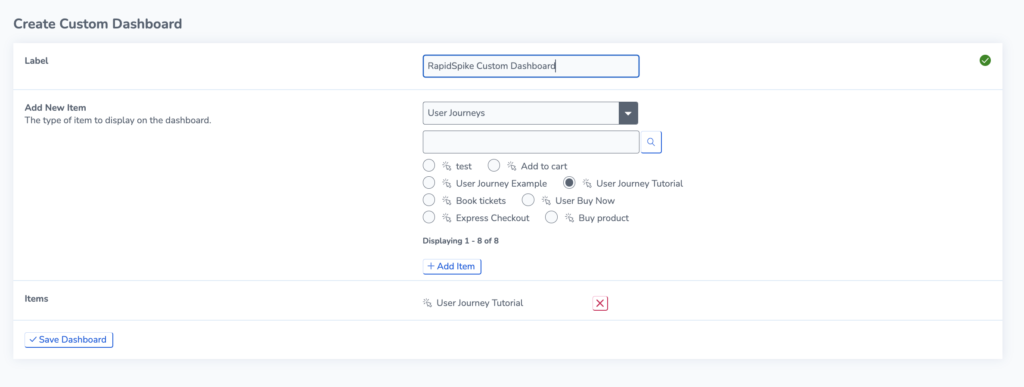
Go to Dashboards > Saved Dashboards > Create. Create a label and add items to include on your dashboard. You can add multiple Servers, Websites, User Journeys and Pages to a custom dashboard.
This will create a custom dashboard with the items selected.