Edit an Uptime Monitor
Introduction
Uptime Monitors are one of the most basic but also essential monitors when it comes to monitoring your website. In RapidSpike you can customise an existing Uptime Monitor as required. This could include pausing your monitor, altering the frequency or location, deleting the monitor, or several advanced options.
Where to find in RapidSpike
To access Page Uptime Settings, navigate to Settings > Websites, Pages, User Journeys & Sitemaps. Find the Uptime Monitor you wish to edit and click on Settings.
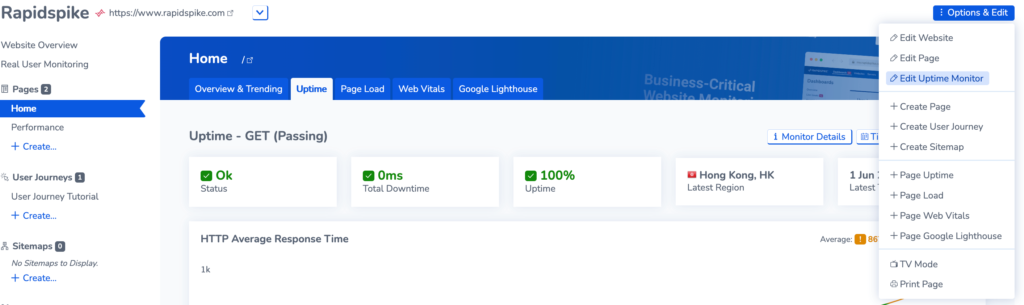
You may also access this directly from the Uptime Monitor itself by clicking on Options and Edit > Edit Uptime Monitor.
Editing your monitor in Page Uptime Settings:
Pause your monitor: Go to Page Uptime Settings > General > Status
Delete your monitor: Go to Page Uptime Settings > General followed by Delete this Monitor at the bottom of the page.
Change the expected HTTP Code
Change the HTTP Method
Configure Alerts: This can be done in Page Uptime Settings > Alerts
Set a Timeout: Enter a value into the Response Timeout value and fail the monitor if response exceeds this value (in ms).
Set up Basic Authentication or Edit a Username or Password: You can set up a username or password for your webpage. This is found in Page Uptime Settings > Basic Auth
Set Custom Headers: Page Uptime Settings > Custom Headers. This can be used for safelisting RapidSpike from bot detection on your site.
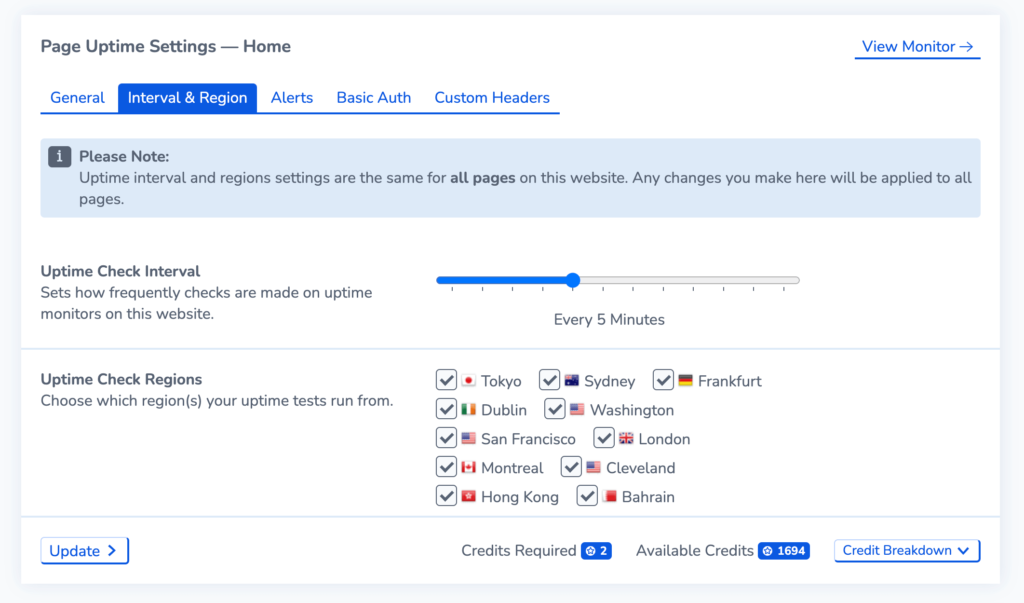
Changing the Frequency & Regions for your Uptime Monitor
In the Interval and Region tab, you may alter how frequently the uptime monitors on your site run. You can also add or remove test regions. When making changes, you can see how many credits are required for the monitor compared to how many are available.
By default, new uptime monitors will check your website status every 5 minutes; however, to have the best downtime coverage on critical sites, the interval should be set to 1 minute. The shorter the test interval, the more likely you are to catch short periods of downtime.