Set Up Maintenance Windows
If your site needs to undergo a period of planned downtime, you can set up maintenance windows to minimise unnecessary failure alerts for your monitors. This allows teams with regular or expected downtime the ability to stop monitoring their systems when required.
How to set up Maintenance Windows
Maintenance windows are configured within your account settings.
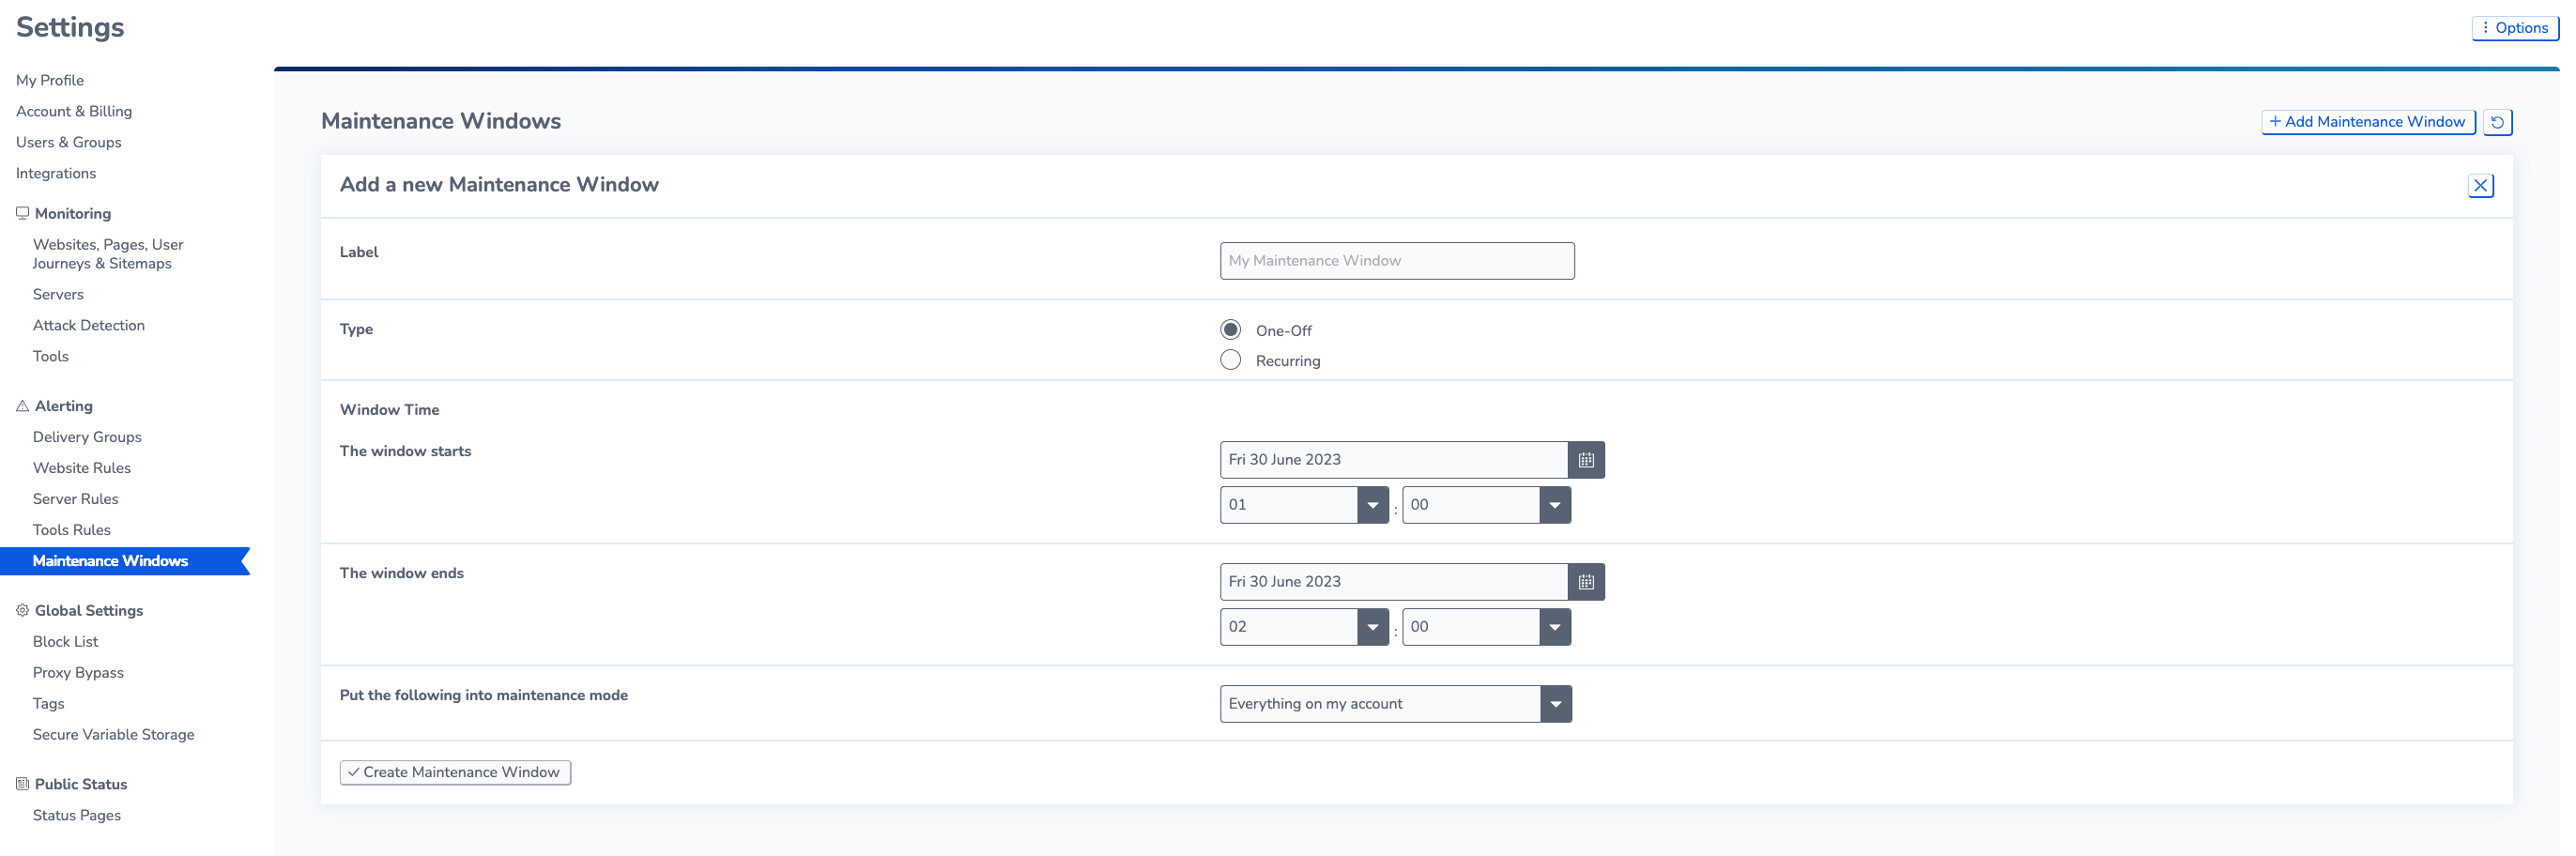
- Go to Settings > Alerting > Maintenance Windows and click Add Maintenance Window.
- Choose a label to identify your maintenance window.
- Choose if you want it to be one-off or recurring.
- Set the start and end date and time.
- Choose which websites are affected. You can choose to pause tests for everything or for specific websites on your account.
Check if Maintenance Windows are Active
You will see a message at the top of the page whenever there is an Active Maintenance Window. Your dashboard results will also be greyed out for the maintenance period.
If you back to Settings > Alerting > Maintenance Windows, the current Maintenance window will be marked as active.

Edit and Delete a Maintenance Window
To edit Maintenance Windows, return to Settings > Alerting > Maintenance Windows to see a list of all of them in your account and click edit to make changes.
To delete a monitor, select Delete this Maintenance Window at the bottom of the page.