This post will describe how to manually build a Ubuntu 18.04 Virtual Machine (VM) server using Oracle’s VirtualBox virtualisation software. Being able to build simple, expendable VMs is extremely useful, whether you’re writing software, building websites or just wanting to learn about Linux servers.
Prerequisites
Create Your VM
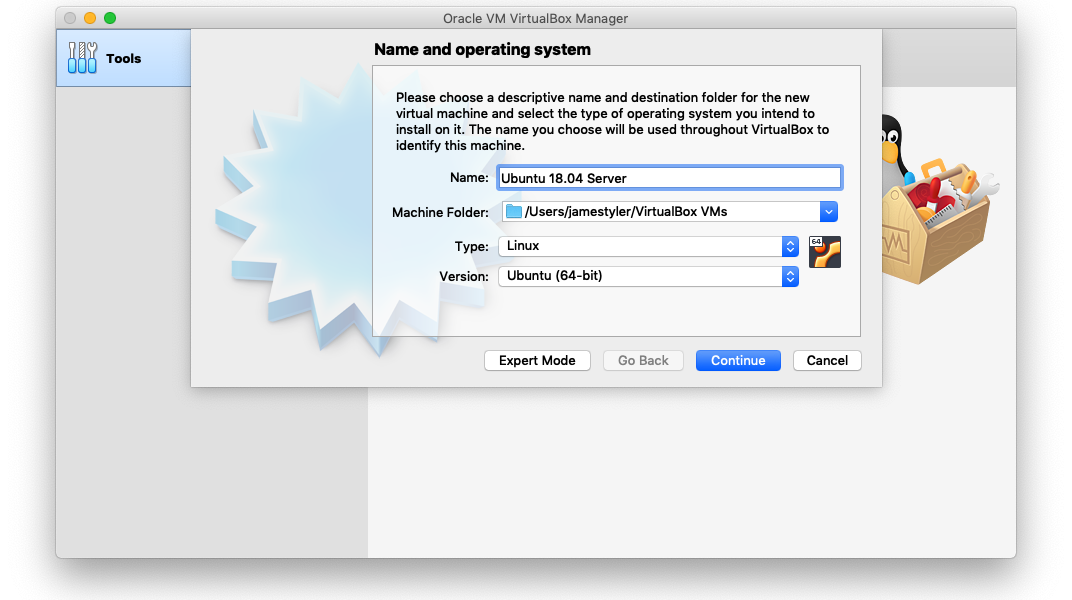
- Open VirtualBox, click “New” and fill in the details of the new VM – set the Type to “Linux” and the Version to “Ubuntu (64-bit)”
- Finish off the New VM wizard using all the default options
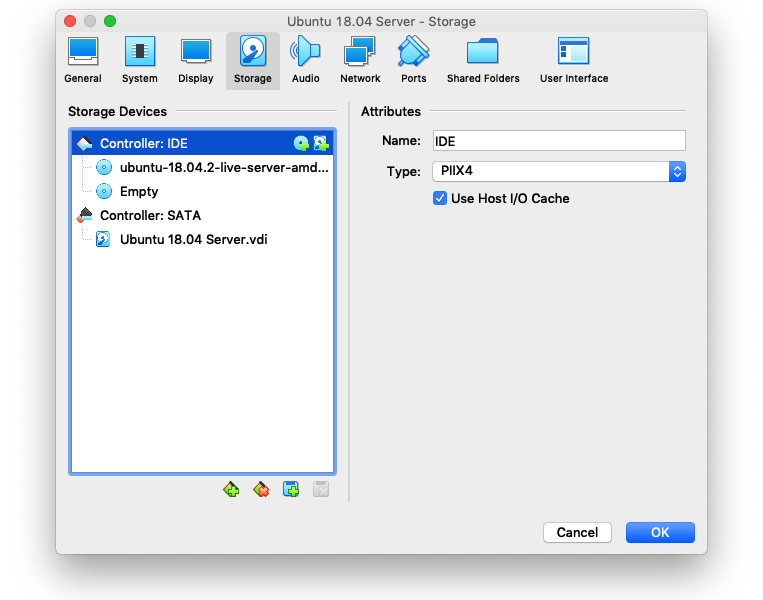
- Click the “Settings” icon and select the “Storage” tab
- Under “Controller: IDE”, click the “Add optical drive option” then select the Ubuntu ISO image, click OK
- Start the VM – this might take a while!
- Follow the Ubuntu installation wizard, using the default options unless you know otherwise – use something simple when picking the server name and login details (I use ‘test’ for everything, including the user’s password)

- Select “Install OpenSSH server” when prompted
- Reboot at the end of the installation process – when prompted to “remove the installation medium”, just hit ENTER
- After some time, once the VM has started again, it’ll look like its stalled or crashed…it hasn’t, just hit ENTER again
- Login with the credentials you setup during the install process – if this worked then power off the VM!

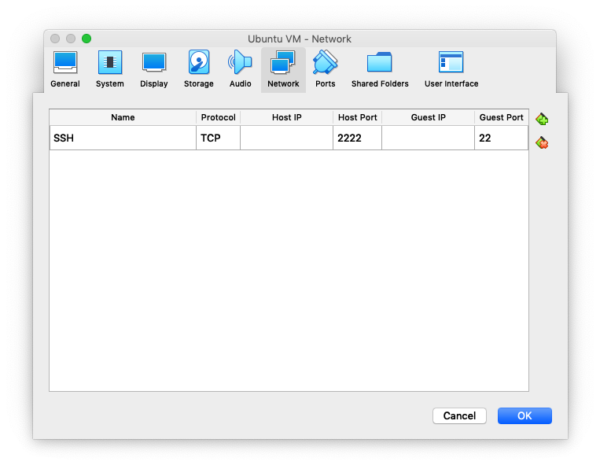
SSH Port Forwarding
We need to be able to SSH onto the server from our host machine to make access easier. To gain SSH access we therefore need to forward SSH’s port to our host.
- Click “Settings” for your VM
- Select the “Network” tab and expand the “Advanced” options
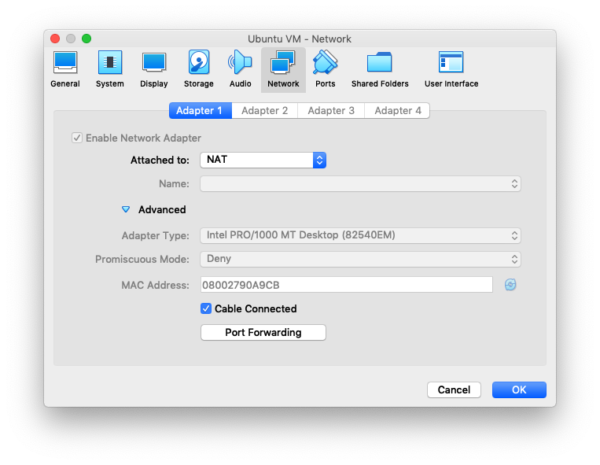
- Click “Port Forwarding”
- Add a new row and call it ‘SSH’, enter ‘2222’ for the host port and ’22’ for the guest port then click OK and OK again
- Start the VM and allow it to boot up – don’t login though
- Open your command line interface
- Run
ssh test@localhost -p 2222and type yes when asked - Enter your password, hit enter and cross your fingers!
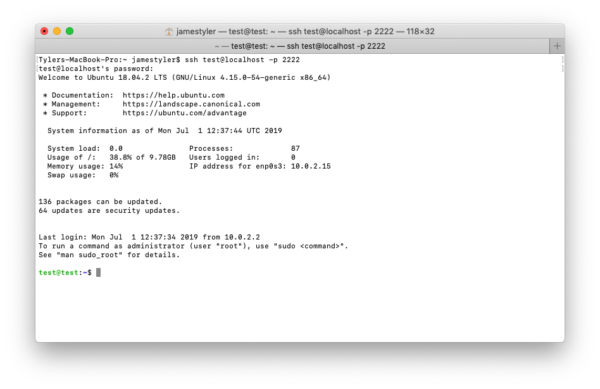
You should now be logged into your new VM over SSH. Now you can start updating, upgrading and installing whatever software you want!