
As the first point of contact with customers, a well-performing website can have a significant impact on the overall reputation of your business. Therefore, if a page is not functioning as it should on your website, this could have a detrimental effect.
Have you ever been on a website and found it is not working as it should? If a customer is unable to perform the action that brought them to your site, such as filling out a form, making a booking, or adding an item to a basket, this could be costing your business. 88% of online consumers are less likely to return to a site after a bad experience.
RapidSpike’s User Journeys can be set up to continuously monitor for broken pages or elements on your website. We have a fantastic resource on RapidSpike Academy for all things related to setting up user journeys and a dedicated support team ready to discuss your website’s monitoring needs. Below, we will go over an example of how User Journeys can be used to check if your pages are working properly for you and your customers:
Imagine a scenario where you have a booking form for customers to select a month for a reservation. If customers can’t choose a date, they can’t make a booking!
In RapidSpike you can easily create a script to check this.
Step 1: Wait For Element
Once you’ve chosen the appropriate selector (in this example, a button to select the month you want to book), we can create our script: First, let’s add a WaitForElement to check if the button loads correctly on the page.
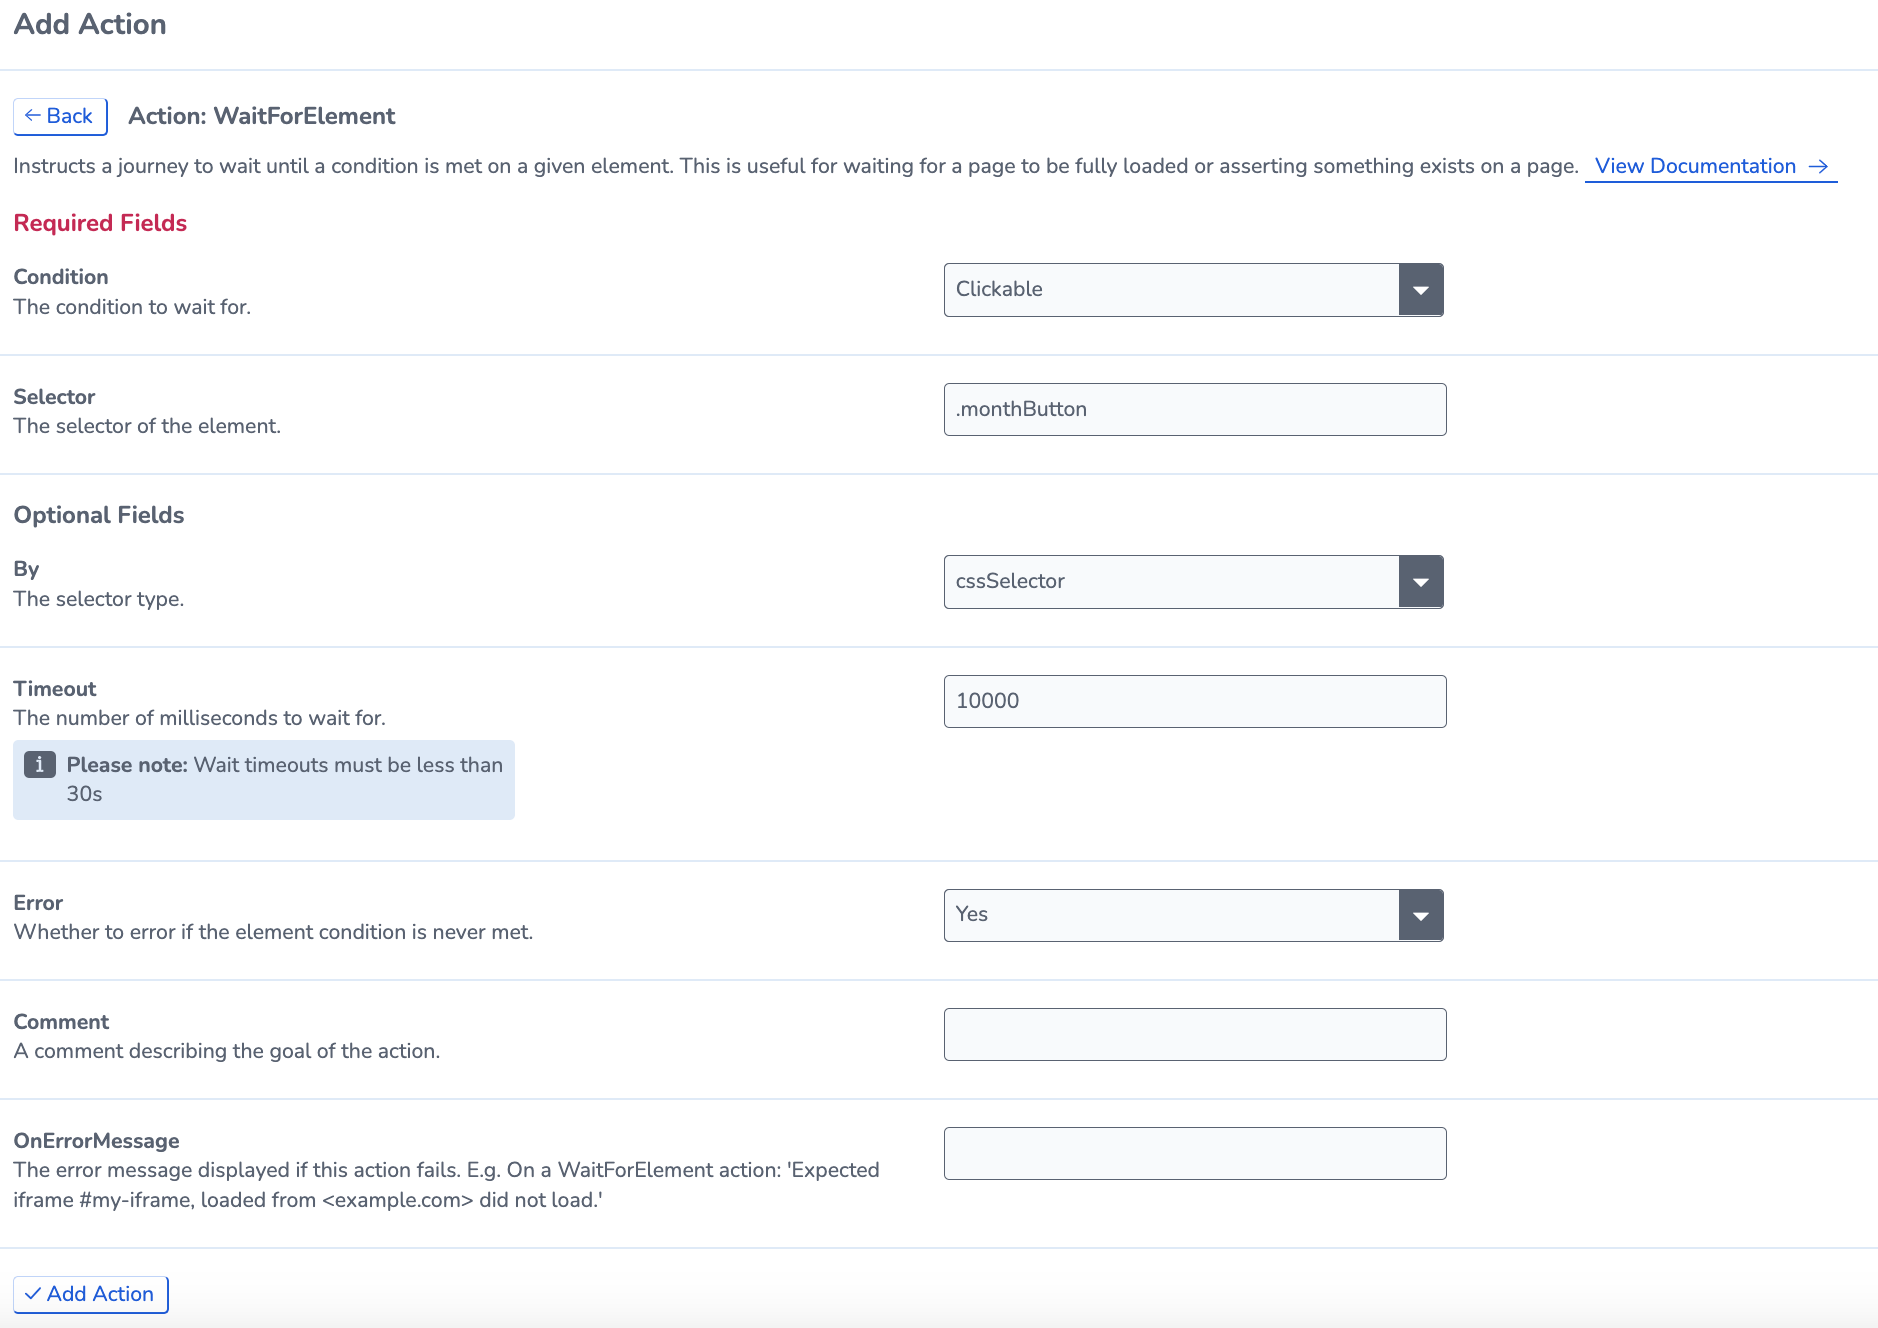
We can see a few options for configuring the WaitForElement:
- The condition is ‘clickable’. Why is this? It means that the action will fail if the User Journey cannot interact with the button in time. This provides a layer of reassurance that customers will also be able to interact with the button in a timely manner.
- Speaking of timings, we have set 10000 milliseconds (10 seconds) maximum to wait for the button. In fact – each second of load time can drop conversion rates by 4.42%, so it is well worth noting how long you are setting the Timeout. How long the script takes is also how long your customers have to wait!
- We have set the ‘Error’ field to ‘Yes’. The button is essential to let customers use the booking form, so we want to be alerted if it fails. You can find out even more about alerting here.
Step 2: Click
We have checked that the button loads correctly, now we need to click on it! This is super simple; all we need to do is select the ‘click’ action in the script editor:
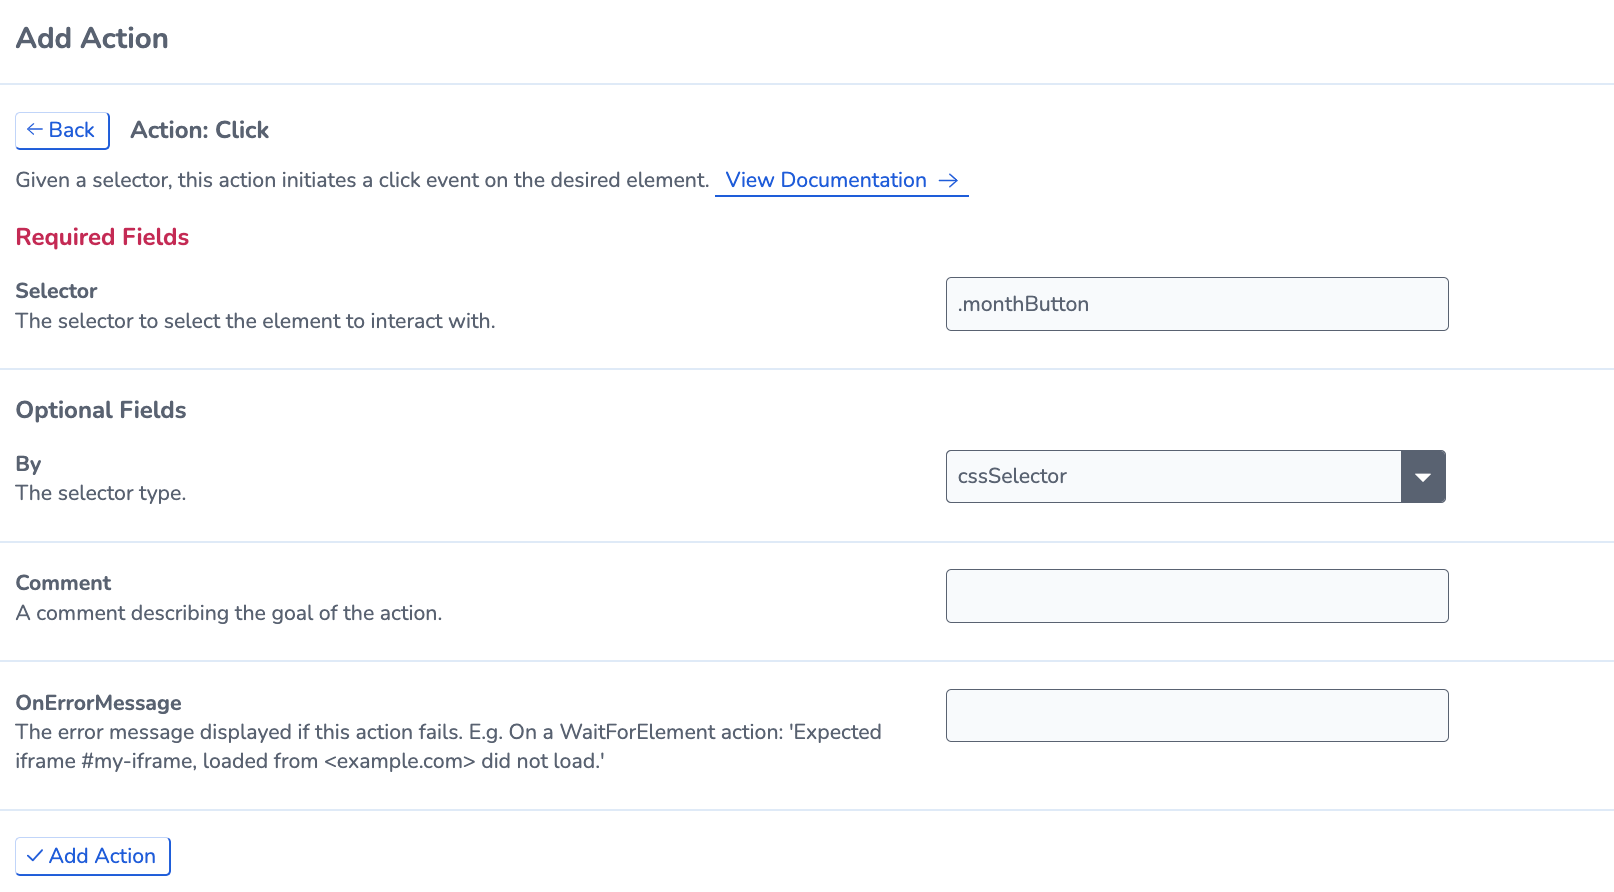
You can even add a comment as well to describe what you want the click to achieve.
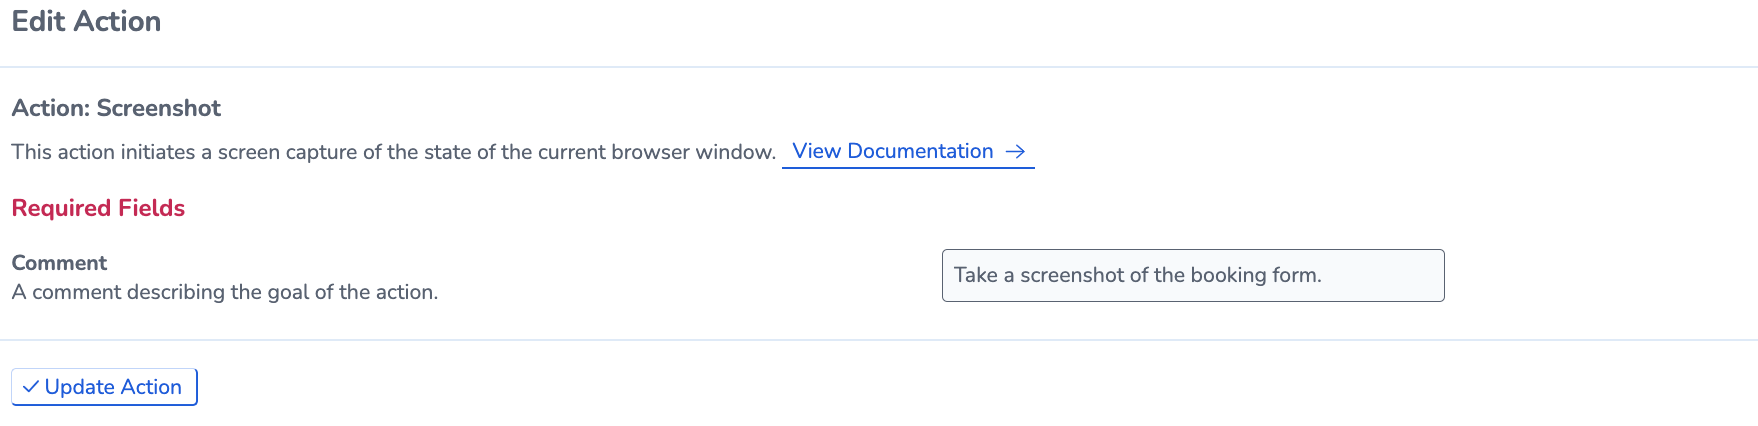
Step 3: Screenshot
It’s always great to visualise what you are scripting. RapidSpike has a handy ‘screenshot’ option to do this. You can see what the click has achieved on your form.
Step 4: Happy Scripting!
Using WaitForElement and Click actions, you can imitate how a user would interact with your site. The Script editor has even more tools to interact with your site in whichever way suits your business needs. You could order a handbag, search for your local library, or even book a flight. There are endless possibilities for how you can test the functionality of your pages in RapidSpike.
If you’re interested in finding out more about how user journeys can be used to monitor your site’s functionality, check out the User Journeys lesson on RapidSpike Academy for an in-depth course. For more information on Managed User Journeys, get in touch with the support team today.