The ‘Add to Cart’ user journey is one of the most common ecommerce customer journeys used by website owners. For obvious reasons, ensuring potential customers can search, select a product, and checkout successfully is a vital function.
Unlike ecommerce customer journey map tools, Synthetic user journey monitoring can assist in creating a positive customer experience by tracking performance metrics, and sending alerts if issues do occur. The steps of the average ecommerce customer journey from Homepage to Checkout are:

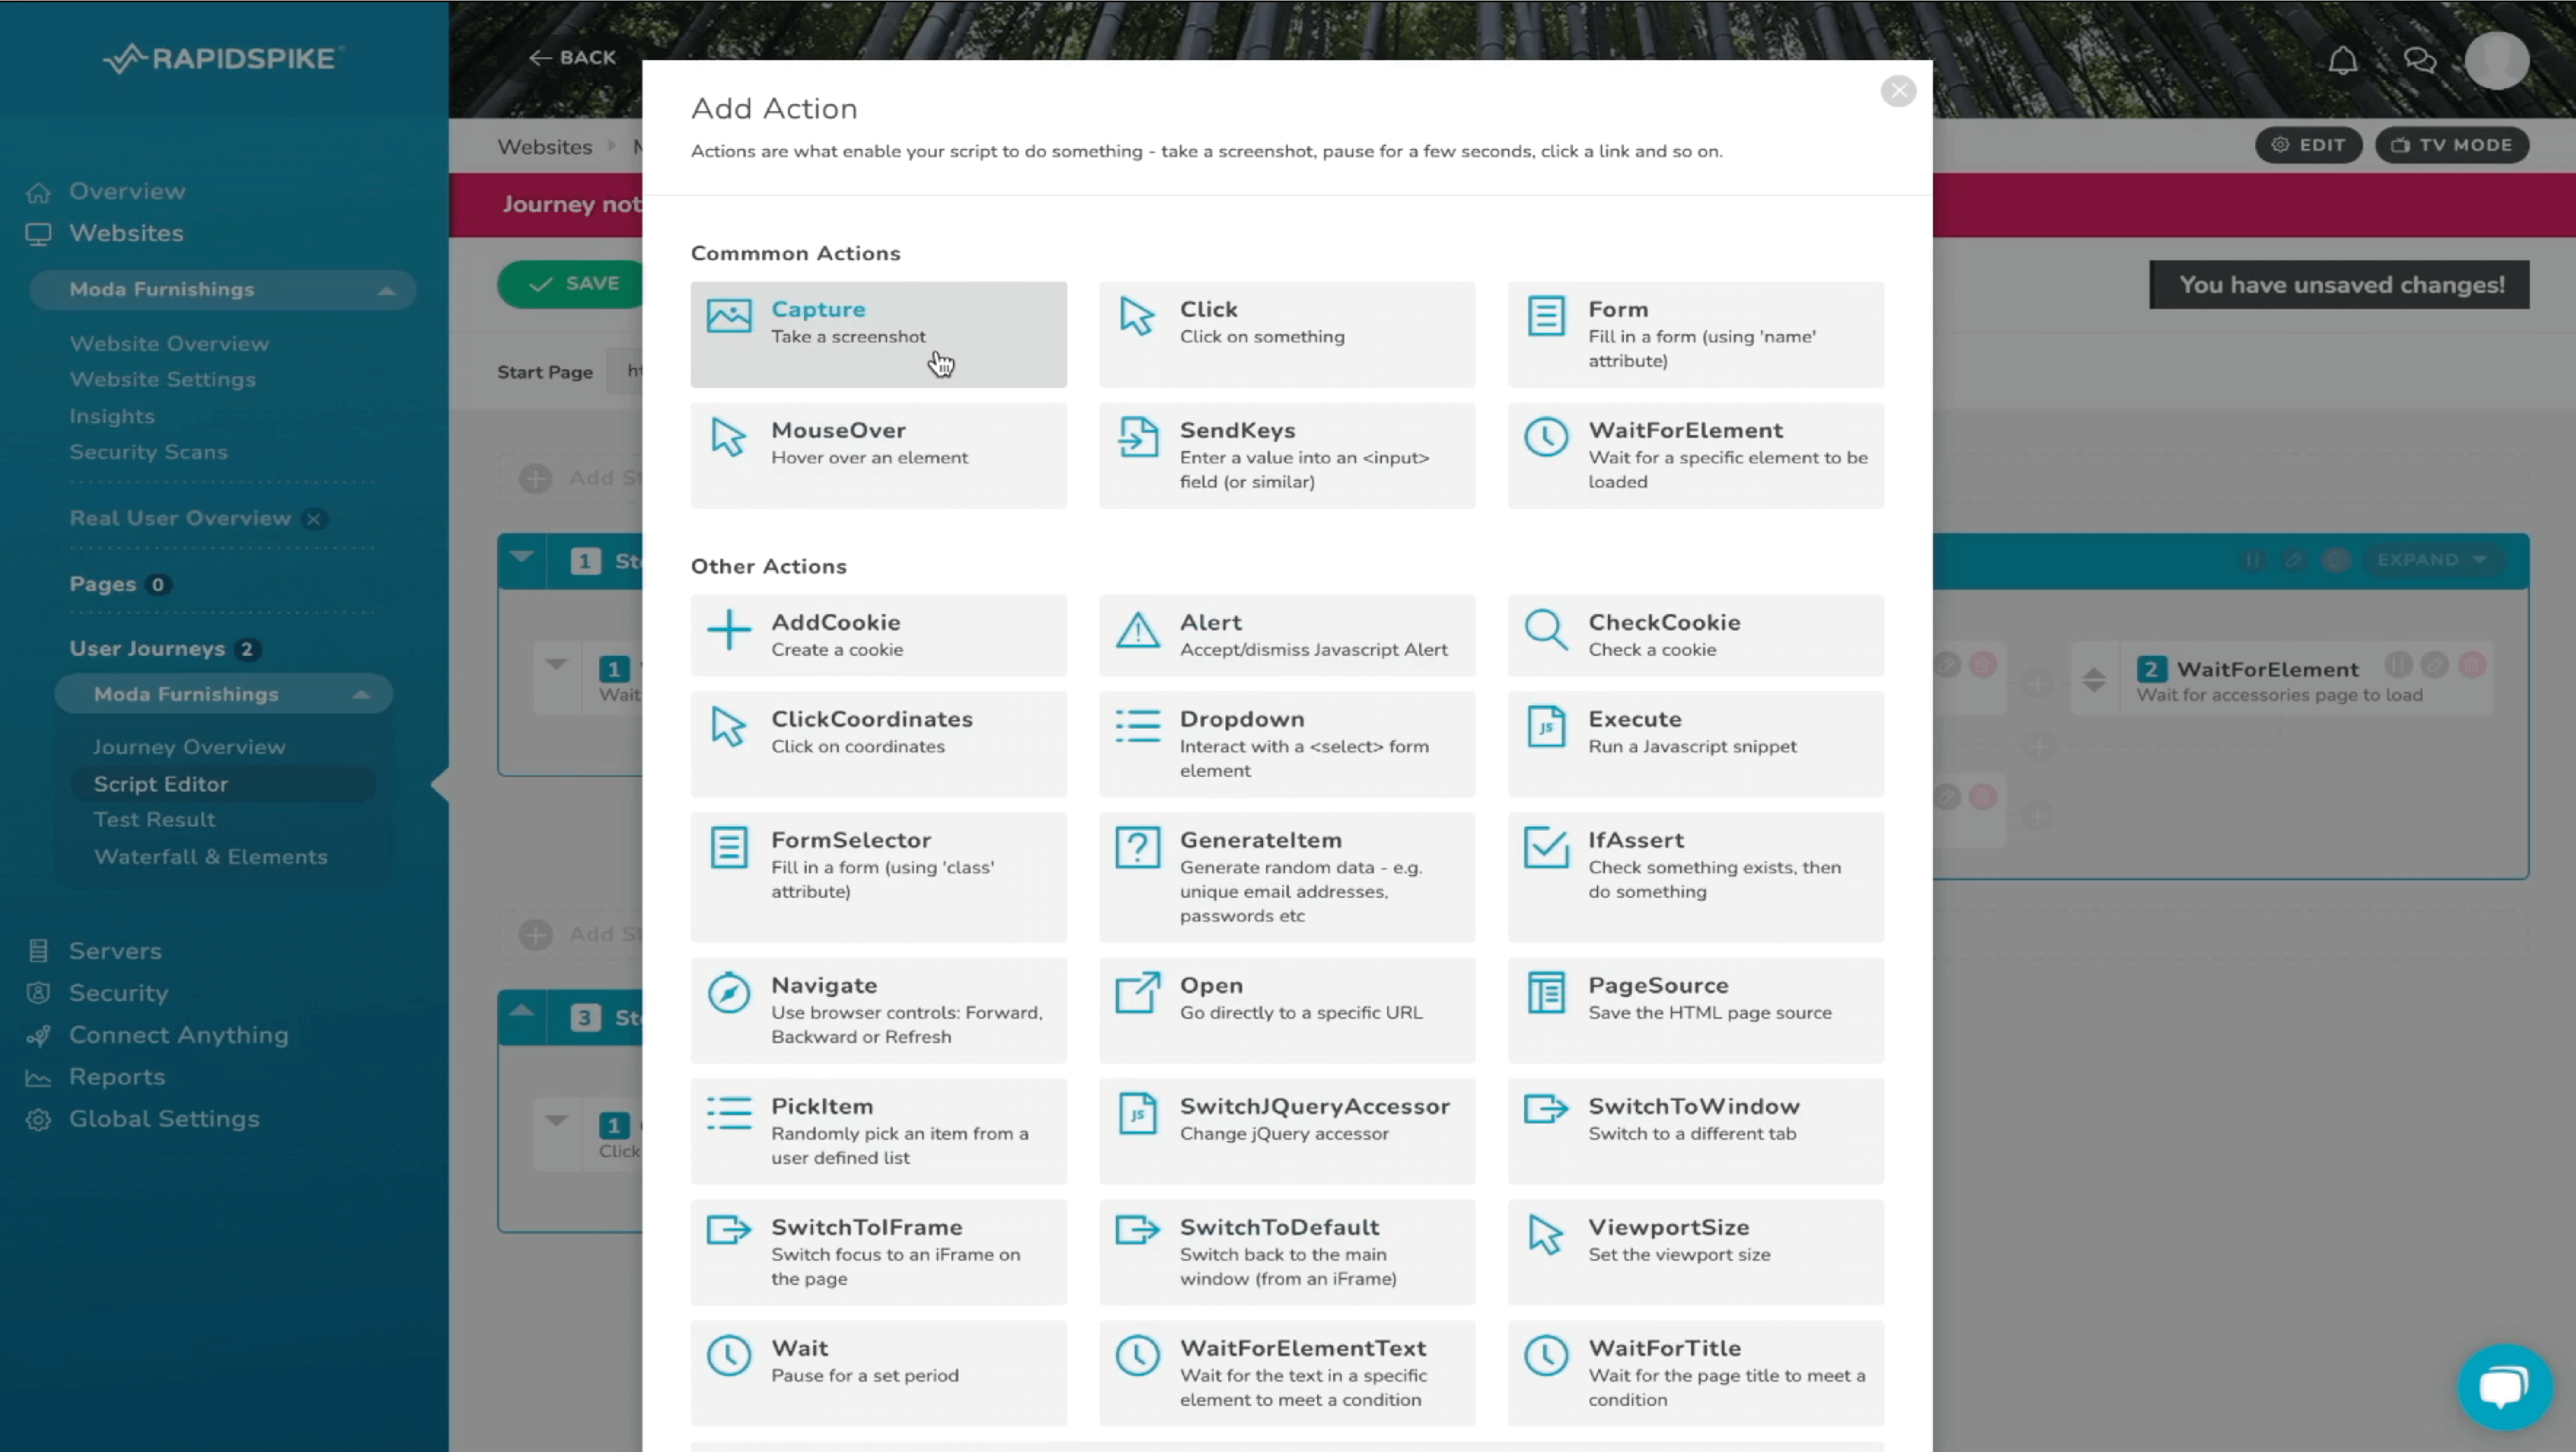
Step 1: Load the homepage
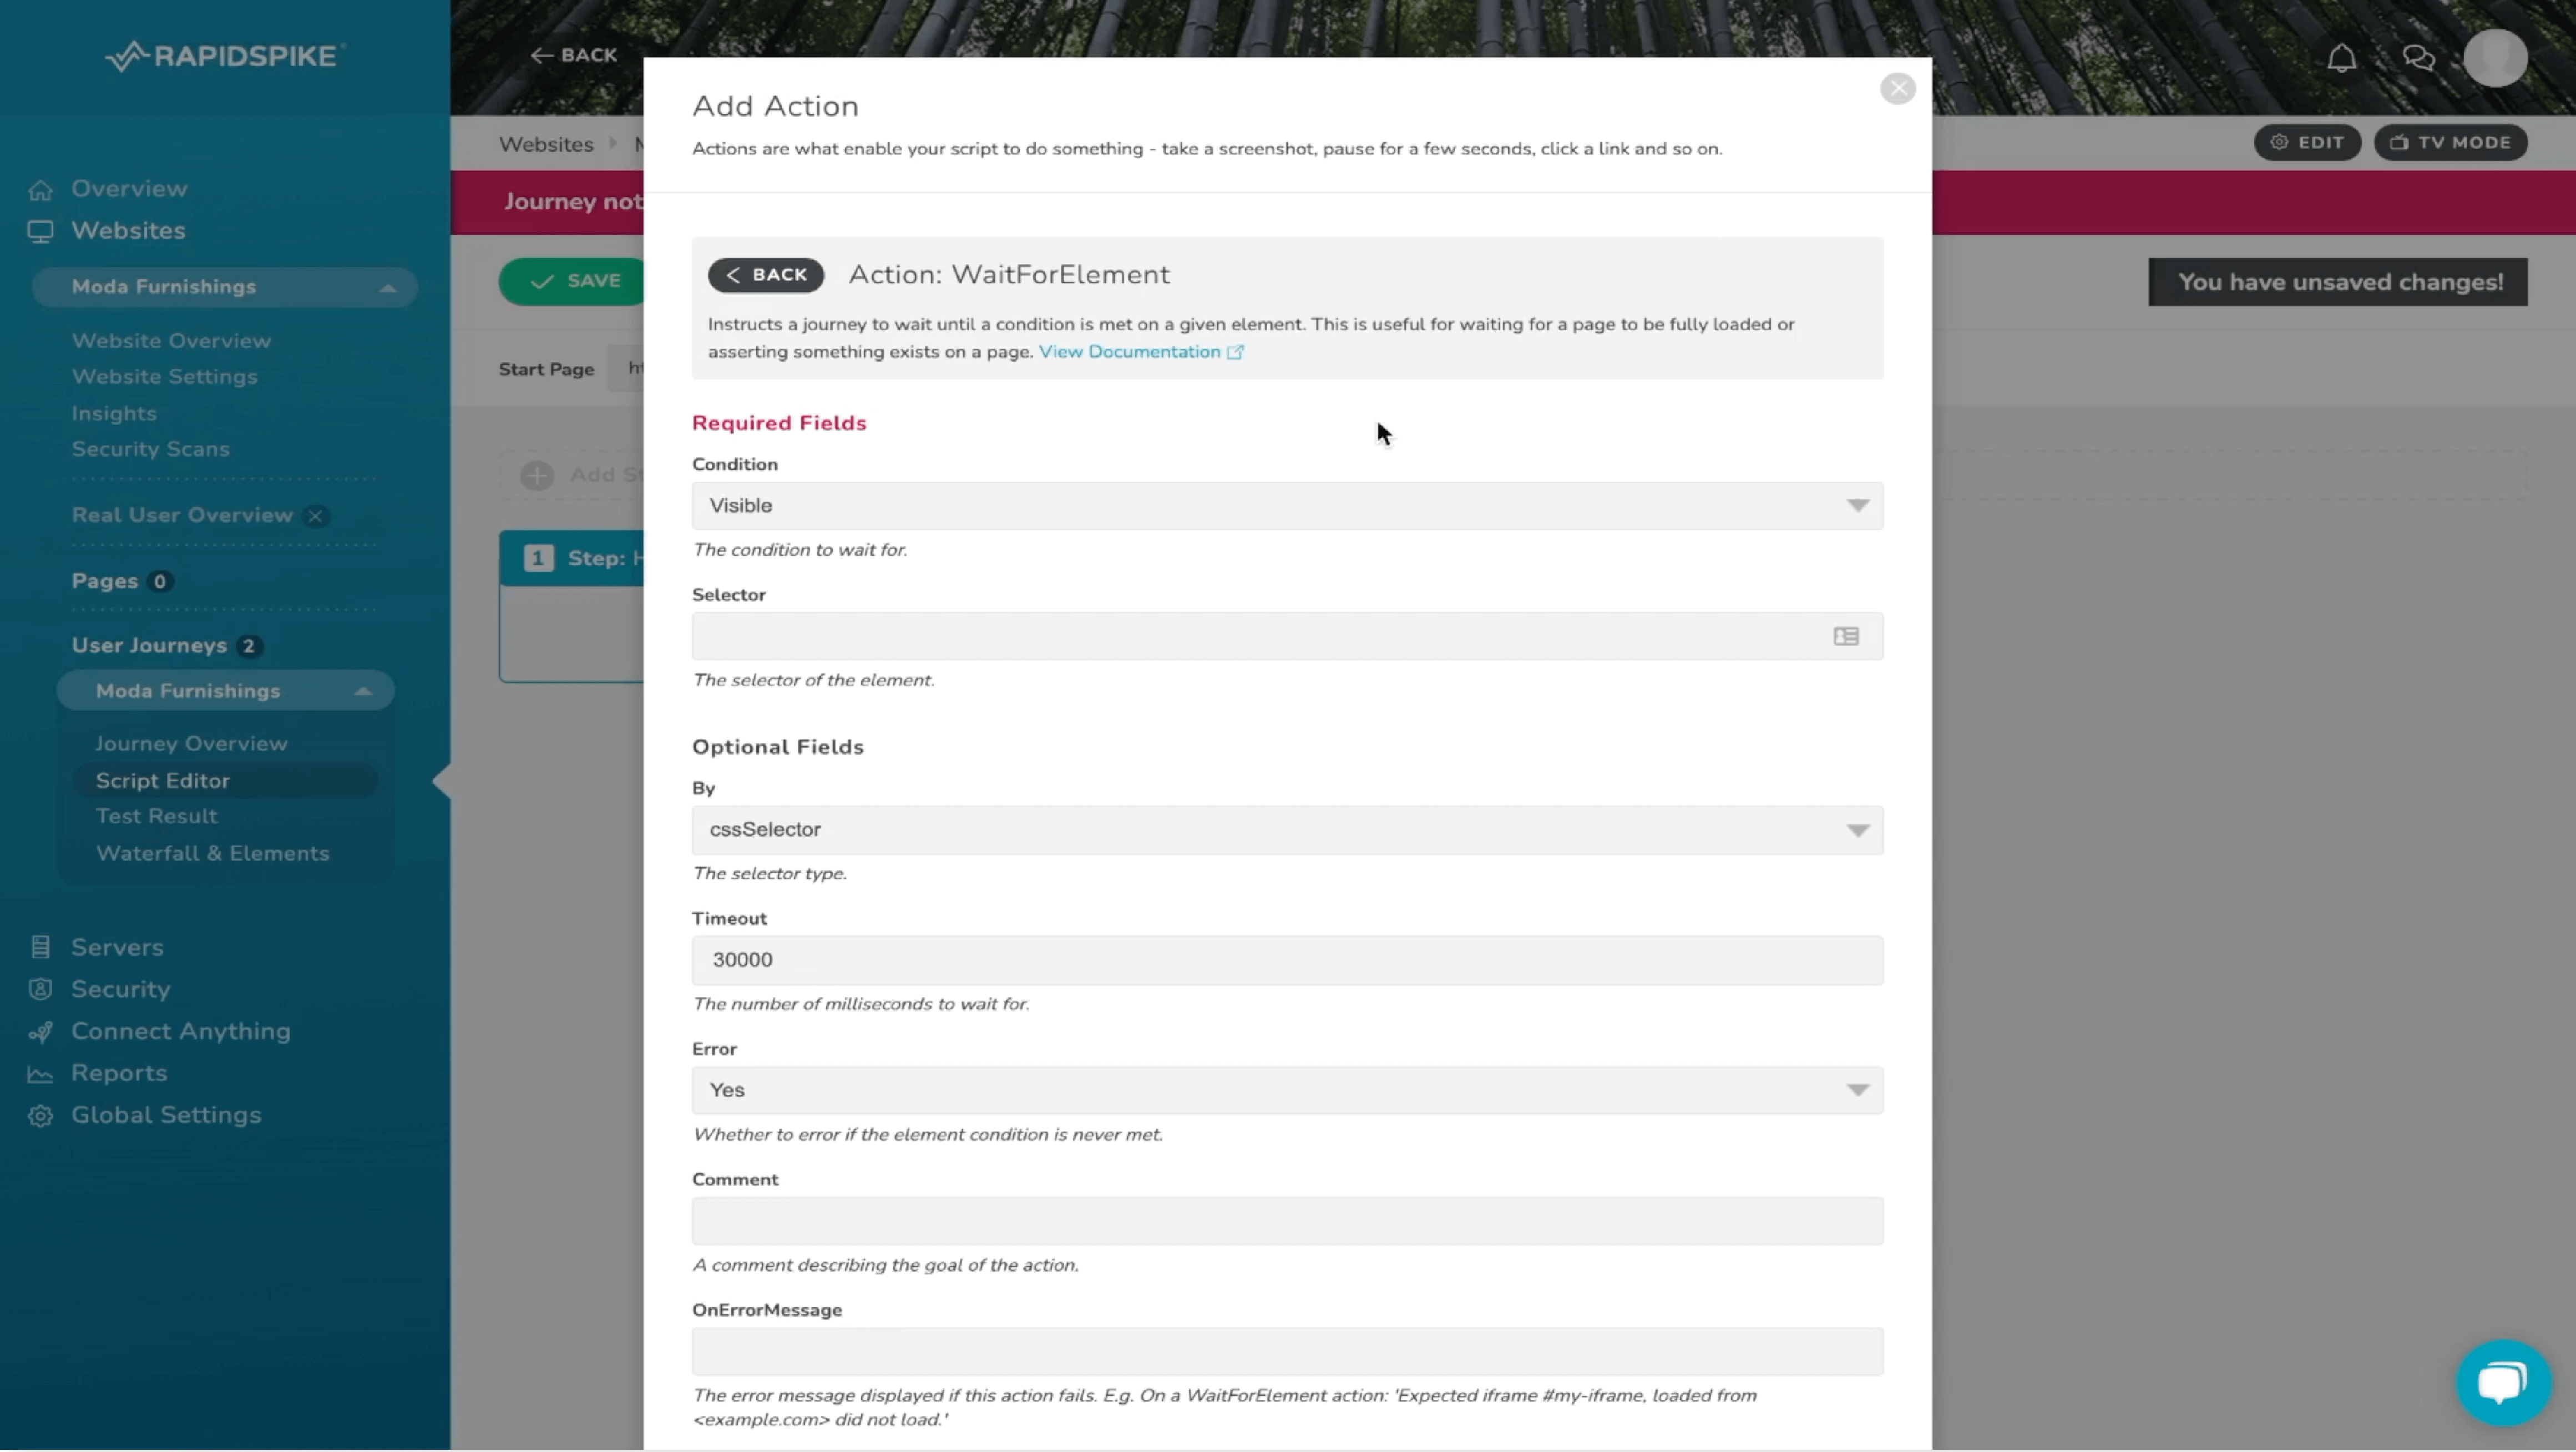
Start your journey by using a Waitforelement action to acknowledge the page has loaded successfully. To find the selector for an element you would like a user journey to interact with, load the webpage and right click on your chosen element. Use the “Inspect” tool from the menu that appears. This loads the code of the website in a pop-up box, which you can through to find the selector you need. Follow this with a Capture action for visual confirmation.
Step 2: Search for a product
Begin with a click to load the next page of the website, such as a product page. Use a Waitforelement action and a Capture to confirm this, and then you can interact with the elements on the page, such as selecting sizes and colours of products. For example, you can click an ‘add to basket’ button.
Step 3 + 4: Select a product and add to shopping cart
Repeat the same process as step 2, where select a product and then add it to the basket. Beginning with a Click, Waitforelement and Capture to load the page, selecting add to basket. It’s advisable to manually replicate the journey whilst you build it in the RapidSpike app, to ensure you account for any pop ups or dynamic elements. This step is important to track as if issues occur at this stage, it could lead to poor user experience and high cart abandonment rates.
Step 5: View cart
Fill in an email input box and an address form. For the input box, you can use a Sendkeys action to fill in a single input box. To do so, find the selector for the email input and enter this into the Sendkeys action in the script builder. Whereas to fill in the address form, use the Form action. Find the selector which highlights the whole body of the form, as well as the name attributes for individual input box within that form. To interact with the address finder, use the Dropdown action. Find the selector for the dropdown menu, and then in the script builder, you can enter either the selector or value of the option you would like to choose.
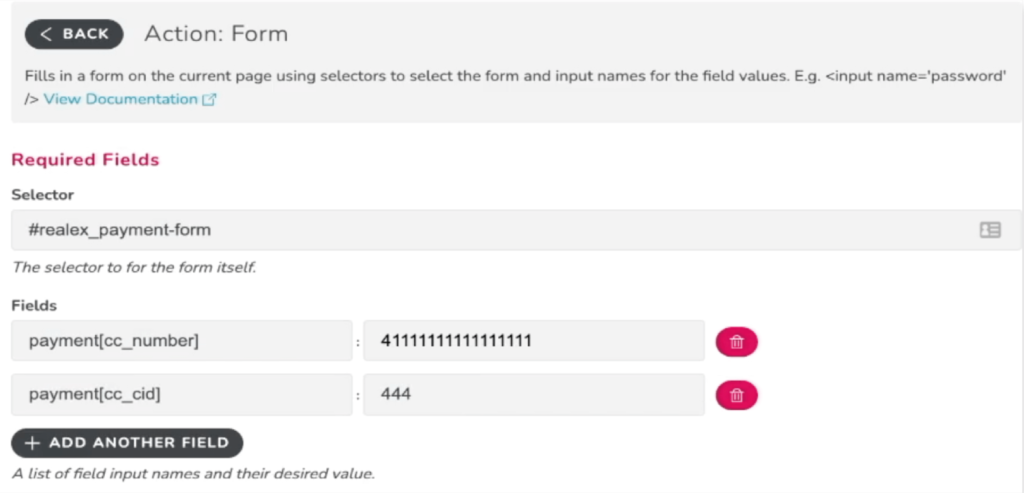
Step 6 + 7: Checkout process and submit dummy payment information
The final steps are part of the conversion stage and need to be monitored to ensure website issues do not lead to poor checkout experience, in turn creating a high bounce rate. To fill in the card payment details you can use the Form action again. Click to place the order and then use a Waitforelement action to wait for the error message in response to the dummy card details, and use a Capture to round the journey off. When you have finished writing your user journey in the script builder, use save and check to run a one-off test to make sure everything is running smoothly. Finally, when you are satisfied with the journey, click publish.
The aim is to ensure that the customer experience is a positive one from the consideration stage to the buying process for your average user. To create loyal customers, ecommerce customer journeys need to be consistently monitored to ensure customer happiness, prevent revenue losses and maintain brand reputation. For more information on RapidSpike user journeys, read our latest technical guide or learn more about the technology behind our synthetic monitoring in our blog post.
RapidSpike CEO Gav Winter talks to the Express about how Synthetic User Journey monitoring can help ecommerce clients with a broad range of website issues to improve website reliability, performance and security to keep customers happy.