Performance and security are the lifeblood of an e-commerce website. The moment pages start to slow down, or your customers fear their data may be at risk, is the moment your business starts to fail.
This post is the first in a series of three that will explore the key tools every ecommerce site needs running 24/7.
Does it work, and is it fast?
Tool: User Journey Monitoring
User Journeys are synthetic monitors. You might have heard of similar products referred to as “Transaction Monitors”, which are like our User Journeys – but without as much detailed performance data.
Synthetic means that the monitor “pretends” to be a human visitor. It uses a real browser (e.g. Chrome or Firefox), with a set screen resolution. It moves a mouse around, scrolls, clicks on things. However, until real AI is invented (we’re working on it!), the synthetic monitor needs to follow a set of predetermined steps and actions that we give it.
For an e-commerce site you have a few key Journeys to test:
- Product Search
Can customers search for a specific product? - Add to Cart
Can customers add a product to the shopping cart? - Checkout
Can you process a (dummy) transaction?
Starting a Journey
Let’s set up a simple “Add to Cart” Journey on a demonstration website – “http://automationpractice.com”.
First we add the website to RapidSpike, then we add a new User Journey monitor to the website:
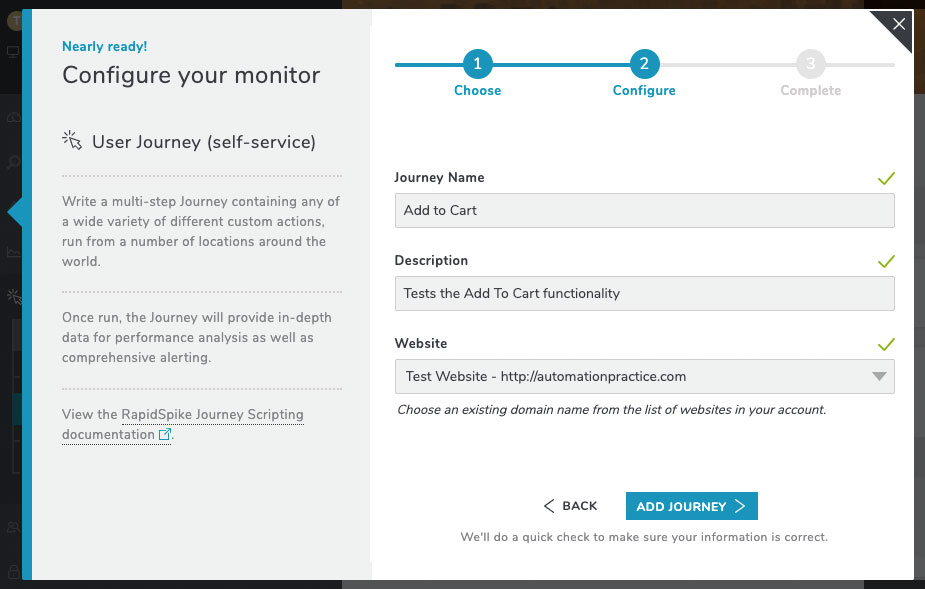
Then we need to create the steps and actions our synthetic monitor will follow.
On the “Script (Steps & Actions)” page, we have two ways to set up our new Journey. First, we can use the Script Builder” wizard, which gives us a nice interface to add steps and create our actions. Alternatively, we can write the script directly into an editor (the script is written in JSON format).
We’ll use the Script Builder wizard in this post. First things first – we add our first step. We’ll call this step “Load the home page”. All we’ll do is capture a screenshot – this is so we know we’ve loaded the page correctly.
Taking Steps
We’re about to move to a new page in the Journey, so we’ll start a new step. Step 2 is where things begin to get interesting. We’ll call this one “Click on a product”.
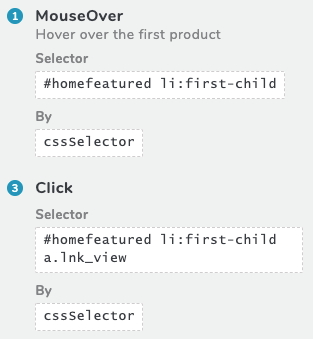
We know the website has some products on the Home page.
On this site, you can hover over the product to get additional options. We’ll hover over the first one, then click it [see image, left].
This might take a moment, so we’ll do a new action called “Wait for Element” before we take a screenshot. This simply tells the Journey to wait for something to load before we continue.
We know there’s an image with the id of “bigpic” on this page, so we’ll wait for that before doing anything else. We’ll then add a screenshot so we can see that the product has been clicked on.
Add to Cart
Next we check the most important button on the page is working: the “add to cart” button. Here’s what the click action looks like here:
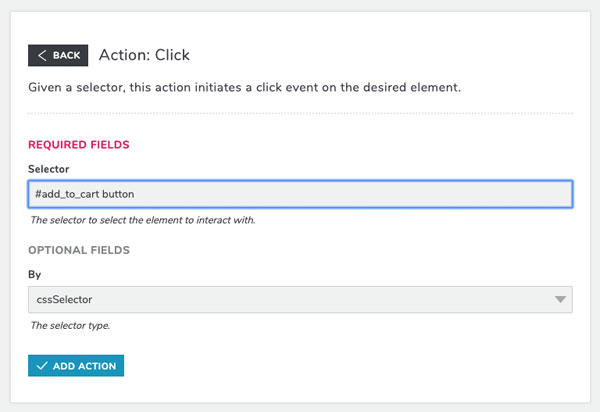
Again, we’ll do a “Wait for Element” to give the site time to load. Afterwards we add another screenshot.
Finally, we’ll go to the checkout page itself. This is on a new page, so we start a new Step, click the button, then wait before we take our final screenshot.
Testing the Script
All that’s left is a quick test so we can see our script is working properly:
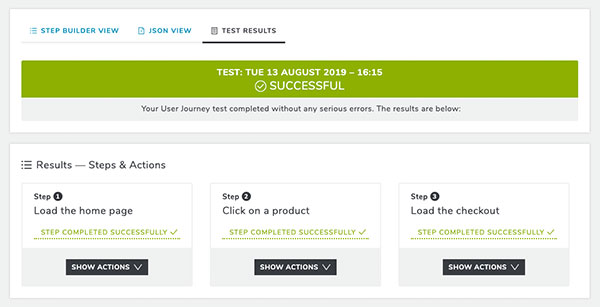
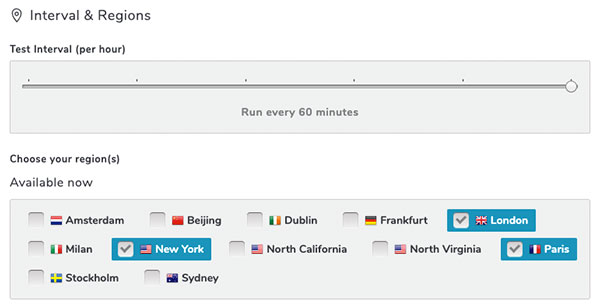
We can then finish the Journey and set it running. For this test we’ll choose to run every 60 minutes from a few different global regions. The locations are usually best picked from wherever most of your customers come from.
What Now?
We now have a Journey that tests a critical process all day, every day. We can set up some simple alerts to notify team members if the Journey fails.
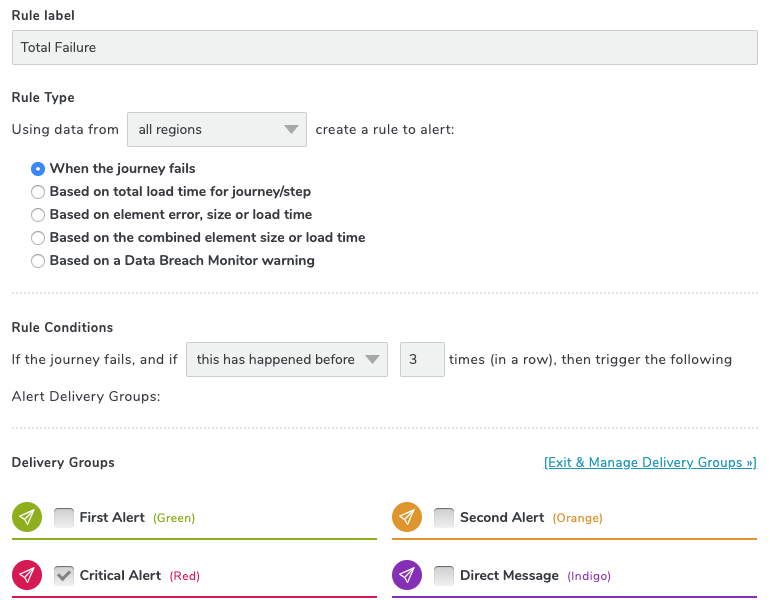
We can also configure alerts based on your performance – so your team will find out if things are slowing down, specific pages are slow – or even certain elements.
The beauty of the RapidSpike User Journey monitor is it’s more than just a simple check to see if your key processes are working. Each test result contains a huge wealth of information about your pages and their elements – giving you performance stats on everything you could possibly need to improve your site speed, including:
- Individual and total page speed
- Speed, size and location of all elements loaded
- Global IP map showing of all elements loaded
- Tracking of all third parties – load times, sizes and speed
- Full waterfall view of elements as they are loaded
- Identify issues detected: failures, slowdown, missing elements
- Browser and Server logs
And best of all, you can set up a User Journey yourself (or with help from our team) on our trial, request your free trial today!